Brooch Bracelet When I first saw Dana Saylor's creations on PW, I will admit I wanted to jump right on the bandwagon. However, once I saw the price tag on those beauties, I thought "Hey I can make my own!" And I did! Supplies:
Directions: 1) Cut a long piece of beading wire (longer than the circumference of your wrist--you will cut it down later) 2) Attach it to one side of the brooch by looping it through a crimp bead, then through a middle opening on the brooch and then threading it through the crimp bead again. Take your pliers and set the crimp bead in place by squeezing it flat. 3) Repeat step 2 twice. Once on an opening above the middle and once on an opening below. 4) Now repeat steps 2 and 3 on the other side. 5) Now you're ready to start beading. Start with the middle strand. You will use the larger pearl beads (size 8mm) here. Thread one pearl bead through the wire and follow it with a rondelle. Now bead two pearl beads and follow those with a rondelle. Continue alternating two pearl beads and one rondelle until the strand reaches about halfway around your wrist. 6) For the next two strands on either side of the larger beads, you will use the next size down (size 6mm). You want to make sure your rondelles alternate with the middle strand. Use 3 pearl beads followed by a rondelle. Continue that pattern until it reaches the length of the middle strand. 7) Now repeat steps 5 and 6 on the other side of the brooch. 8) You may have to play around with the length of both sides to ensure proper fitting around your wrist. Once you are happy with the lengths, you are now ready to attach your clasp. 9) Thread your wire through a crimp bead then through the corresponding loop on the clasp. Finally thread the end of the wire through the crimp bead again and close it with your pliers. 10) Repeat step 9 for all strands. Queele: http://www.projectwedding.com/wiki/show/diy-wedding-challenge-brooch-bracelet |
Sonntag, 10. Mai 2009
Labels:
Accessoires,
DIY,
Styling,
Tutorial
Samstag, 9. Mai 2009
Hochzeits Haarclip
Materials:
 Instructions: Instructions:Remove the flower from the stem. If your flower is almost the size of your head like mine was, remove a few of the outer petals to make it smaller. Also remove any plastic pieces from the center of the flower. Glue the petals back together on top of each other, layering them by size.  If you're using feathers, trim them down to your desired size (longer for more feather goodness, shorter if you want them to be subtle) and glue them to the backside of the flower. If you're using feathers, trim them down to your desired size (longer for more feather goodness, shorter if you want them to be subtle) and glue them to the backside of the flower. Then you can add the alligator clip on top of the feathers. I made sure the clip I bought had a large, flat surface so I could glue it to the flower. Then you can add the alligator clip on top of the feathers. I made sure the clip I bought had a large, flat surface so I could glue it to the flower. While the feathers and clip dry, start working on the inside. Take one of the small styrofoam balls and cut in in half. Take a bead and thread it onto a flat-head pin. Cut the pin to a shorter length so it will stick into the half-sphere, but not out of the other side. Dip the pin in the fabric glue to ensure it stays put once you've stuck it into the ball. While the feathers and clip dry, start working on the inside. Take one of the small styrofoam balls and cut in in half. Take a bead and thread it onto a flat-head pin. Cut the pin to a shorter length so it will stick into the half-sphere, but not out of the other side. Dip the pin in the fabric glue to ensure it stays put once you've stuck it into the ball. Start arranging the beads in random order (or you can make a pattern if you like) by sticking them into the styrofoam. This will give you a 3-dimensional look once you add it to the center of the flower, which really shows off the sparkle. Start arranging the beads in random order (or you can make a pattern if you like) by sticking them into the styrofoam. This will give you a 3-dimensional look once you add it to the center of the flower, which really shows off the sparkle. Once you've covered the styrofoam, add a generous amount of glue to the bottom of the beaded ball, and stick it in the center of your flower. Once you've covered the styrofoam, add a generous amount of glue to the bottom of the beaded ball, and stick it in the center of your flower.  And there you have it! A custom-made, one of a kind hair flower for under $20.00. Have fun with it...change the bead or feather colors to match your wedding colors, or even do a colored flower. And there you have it! A custom-made, one of a kind hair flower for under $20.00. Have fun with it...change the bead or feather colors to match your wedding colors, or even do a colored flower. For more DIY projects, visit my blog! Quelle: http://www.projectwedding.com/wiki/show/diy-hair-flower and http://www.withthisringwedding.blogspot.com/ |
Labels:
Accessoires,
DIY,
Styling,
Tutorial
Bridal Shoes Letter Bling
Step-by-step instructions on how to put rhinestones on the undersides of your bridal shoes with your initials for the big day!  photo by: AnnaB83 I saw a couple pictures of blinging up the bridal shoes with the initials of the bridal and groom, and I couldn't help myself from doing another DIY project! I wish I could have a little diversity, but our names are "Anna" and "Andre" so I'm stuck with "A" and "A." I suppose you could do your own initials or your new initials after you'll be married, but I wanted it to be the two of us :) I saw the pics, but didn't know how it was done, so I came up with my own method and it worked beautifully! First, I printed an "A" in a few of my favorite fonts to test out which one I'd like best. I cut them into little squares and decided on what I liked best...then I printed out different sizes of the chosen font to see what would be the best fit. 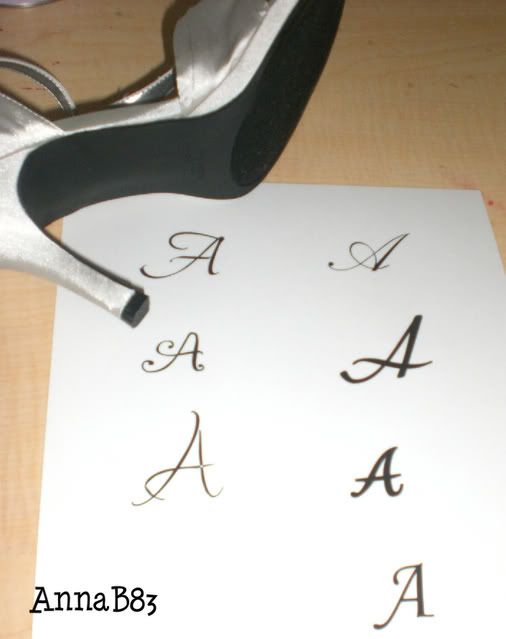 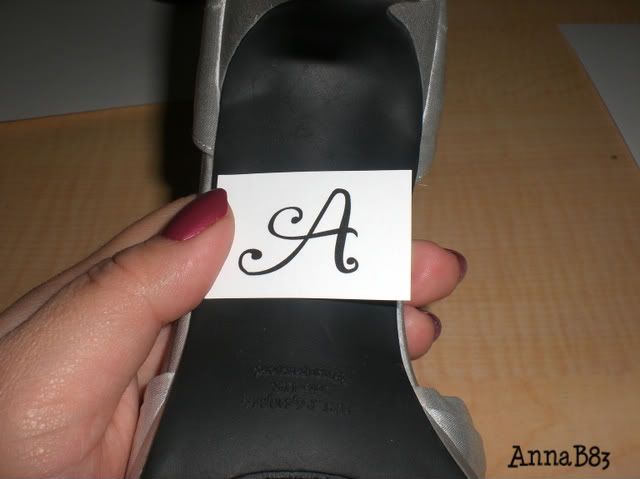 Next, I taped the square onto the shoe and used a safety pin to poke holes to trace the letter onto the rubber sole. Once I peeled the paper off, there was a faint outline of the letter (so I don't have to worry about a glue mistake doing it freehand). 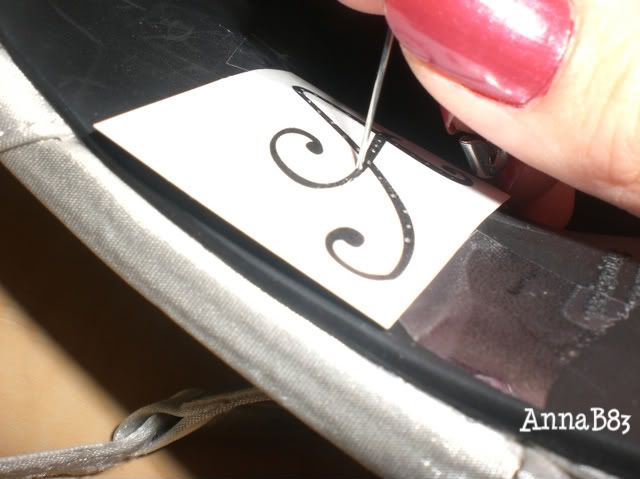 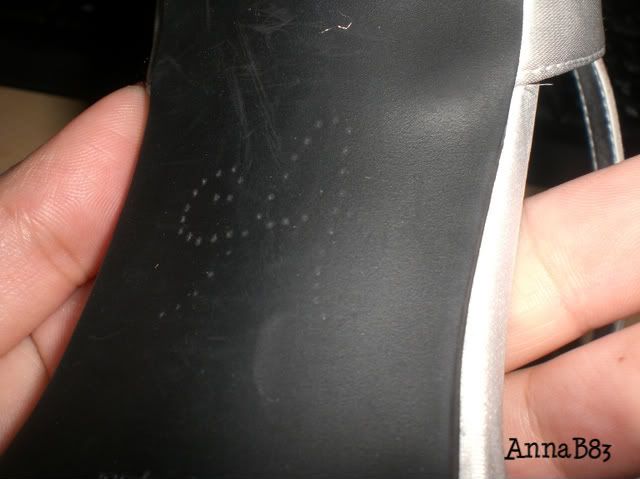 Then, I traced a little part of the outline with clear nail polish (actually it was nail hardener so I don't know if that made a difference but its STRONG!). I took some tweezers and one by one put the little lilac rhinestones on along the nail polish. After it dried, you could no longer see the nail polish. 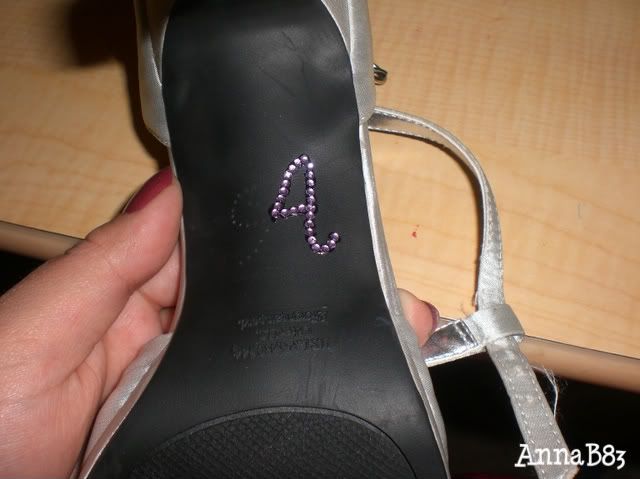 I decided not to do the little loopy thing at the end because I wanted to hang on to a few extra rhinestones just in case a couple fall out before the wedding (since I still have 5 months to go and a few more fittings). I like them the way they are, but still might finish that little loop at the end. If not, the pin pricks don't show up...only at a certain angle in the light. 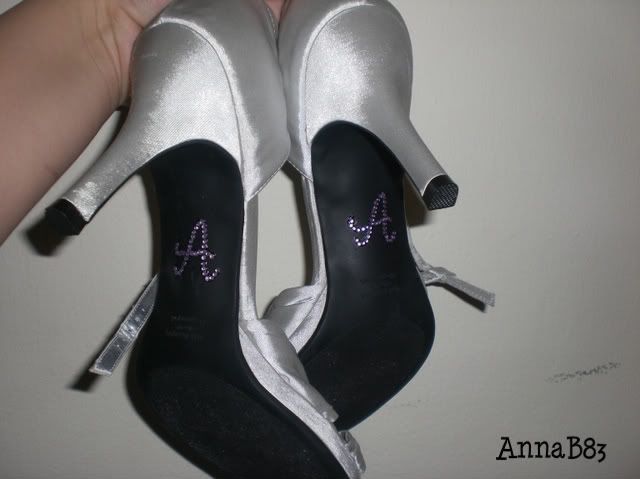 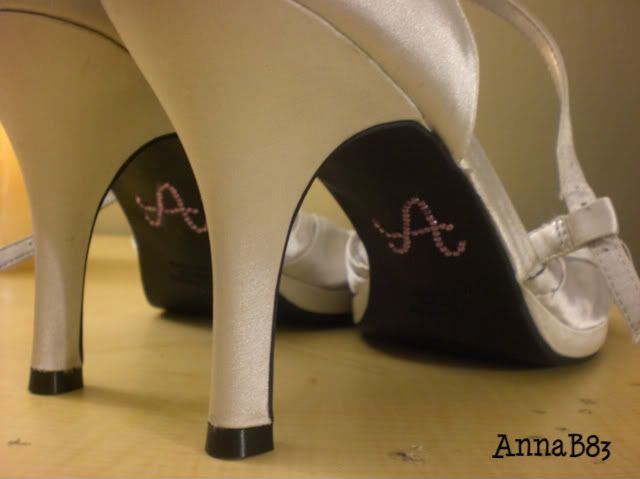 Quelle: http://www.projectwedding.com/wiki/show/bridal-shoe-bling Freie Übersetzung folgt |
Labels:
Accessoires,
DIY,
Styling,
Tutorial
Sonntag, 3. Mai 2009
Bridal Party Survival Kit
While we would hope that one's wedding day would be perfect in every way, there are bound to be a few snags here and there. Your maid-of-honor gets a blister from her new high heels, one of your bridesmaids comes down with a headache due to a few too many glasses of wine at the rehearsal dinner the night before, and another bridesmaid dribbles a bit of her shrimp cocktail sauce on her mint colored dress. Thankfully, you thought ahead and prepared a cute survival kit for them. Aspirin, band-aids, spot remover, breath mints and tissues are all good items to include to help your maids through the long day, so they can focus on what really matters: you and your groom.  Jillian came up with this cute idea you can make WAY ahead of time and pass out to your ladies before the wedding. All you have to do is create a label (or use our templates), print, cut it out, fill your cellophane bag and staple the label over the top. Sooo easy. Have a fun weekend everyone. We're working on a bunch of good posts for next week. Link: http://100layercake.com/blog/archives/520 |
Abonnieren
Posts (Atom)


